Making Single Malt Whisky (1)!
18 October 2017
Introduction
Here is a first post of the iStill Team making single malt whisky. Full bodied, peated, whisky, that is what we are after. We have made single malt before, but we are now doing it on a bigger scale. And we are using the iStill 2000 NextGen to do the whole process. The whole process like in mashing, fermenting, and distilling. Let's explain how we do that.
Mashing
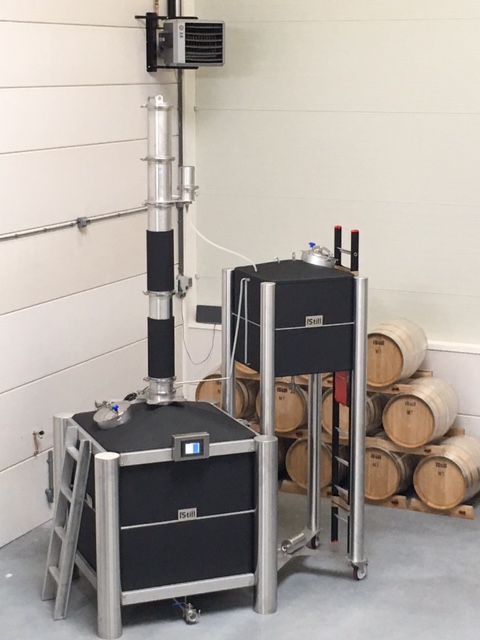
So, we have an iStill 2000 NextGen and its 550 liter Extractor. Here's how we did the mashing. We asked Castle Malts from Belgium to deliver cracked peated barley malt. We added chocolate malt to the mix, as a small adjunct.
We put the malt in 20 liter bags. We then lifted these into the Extractor, using the forklift. Next step? We heated some 1600 liters of water in the iStill 2000 and brought it to 61C. We used a pump (that we are currently integrating into the Extractor set-up) to move the water from the boiler into the Extractor, thus extracting and converting the starches into fermentable maltose sugars.
The last step in the mashing process was that we brought the now sugar rich boiler content (around 1500 liters) to 75C for a 5 minute pasteurization.
The goal of mashing? To make around 1500 liters of whisky mash and bring it to SG 1.065. We are aiming for an 8% ferment. Mashbill: 97% peated barley malt, 3% chocolate barley malt. Mashing pH 5.2. Calcium count brought to 150 ppm (with bicarb) and pH drop to pH 4.8 after mashing (using lactic acid).
The higher calcium count makes the fermentation stand up to pH drops (resulting from sugar consumption and CO2 production) much better. And the lower pH helps protect against (most) bacterial infections as well as that it further increases esterification (AKA more taste formation).
Fermentation
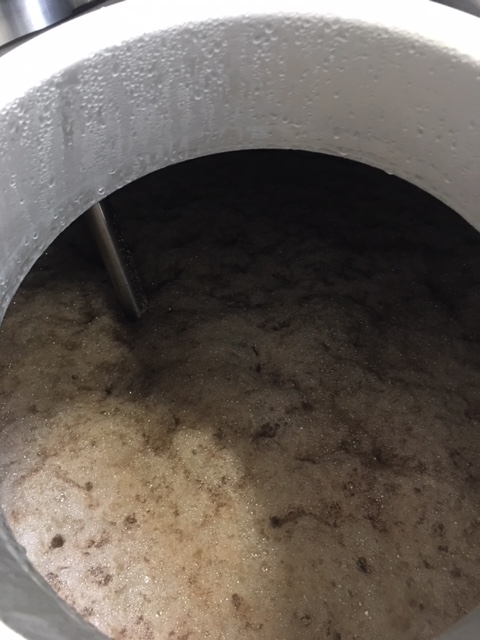
When mashing was done, we used the boiler radiator in the iStill 2000 to bring the wash down to 28.5C. We then added 1000 grams of granulated baker's yeast by sprinkling it on top of the mash. Baker's yeast is great, because it tolerates higher temperatures (equalling higher amounts of taste formation). And it leaves a little bit of the sugars unfermented, potentially increasing taste with another 15 to 20% due to Maillardization while doing the actual distillation run.
All right. The fermentation took off in minutes. First 36 hours were quite violent. The iStill 2000 followed a 6 day fermentation scheme, with a maximum temperature of 28.5C. It stayed there for the first day and a half. The fermentation temperature dropped to 24C over the course of the next few days. I decided not to use the temperature control to keep the temperature higher. Instead, the fermentation just went at its own pace. A little slower then when it would have been at 28.5C the whole time ... but longer stands for more esterification.
We measured pH twice. Remember that we started at pH 4.8? After the first day, we had pH 4.23. After three days pH 4.45. Nice values. Below pH 4.8 for extra esterification, while steering clear of potential bacterial infections.
After the fermentation was done, the iStill 2000 switched to cooling and agitating. To get rid of residual CO2. If you are making what's basically a beer, there is a potential of foam building up during distillation. Cooling and agitating help prevent that. As does a silicone based anti foaming agent: 200 ml's for this 1500 liter charge.
Heating-up
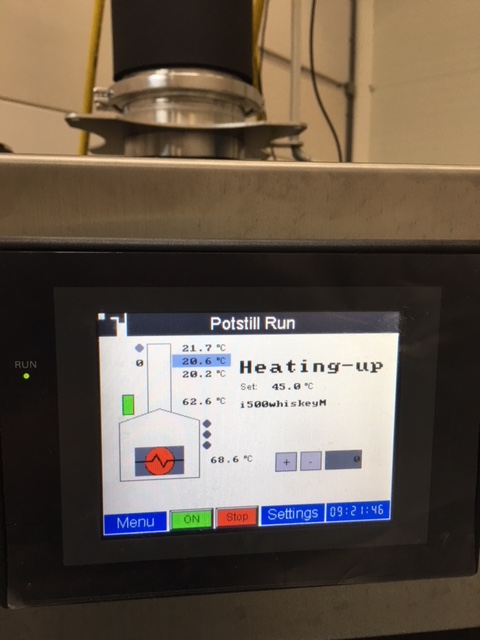
We have started heating-up this morning. As we speak, the iStill 2000 is ready to take Heads. Hearts, as you know, come after that. Do you want to know how that goes? I'll update you tomorrow or the day after. Gotta hang up right now. Heads are eminent and I want to be next to the machine, when that happens!
iStill 2000 and Extractor for mashing ...
Fermentation is on its way ...
Heating-up before distillation ...
www.iStill.eu
Reactions
Add your comment
All reactions ()
Loading comments..